In the "Manage Bank Statement Transaction Creation Rules" page, you can either create a new Transaction Creation Rule or view an existing Transaction Creation Rule:
One example are Bank fees. Bank Fees are external
transactions that are not going to be recorded in your ERP applications, but
that you need to record once you receive the bank statement.
Transaction Creation Rule is connected to a legal entity and
a business unit you need to specify the criteria to identify the bank statement
line such as transaction codes and transaction types, which is 698 and Fee in
the sample above. Once the program finds that transaction, then it will create
an external transaction with the provided accounting information because you
need to create accounting distributions and ultimately a journal that you send
to GL.
Below is a step-by-step demonstration of Creating a Bank Statement Transaction Creation Rule in Oracle Fusion Applications:
This article gives a quick overview of the Bank Structure and demonstrates how to create custom Banks, Bank Branches and Bank Accounts in Oracle Fusion Applications.
One of the main configurations for Cash Management is you have to define banks, branches, and the actual bank accounts. The Bank and the Branch information are stored in the Trading Community Model (TCM) tables where, whereas the account is stored in Cash Management tables.
To create custom Banks, Bank Branches and Bank Accounts in Oracle Fusion Applications, on the Springboard, click on the Navigator and go to the Functional Setup Manager (also known as "Setup and Maintenance" page):
Select the "Financials" offering, and select the "Cash Management and Banking" functional area and select the task "Manage Banks". Alternatively, you can click on the Task Panel and choose the "Search" function and enter "Manage Banks":
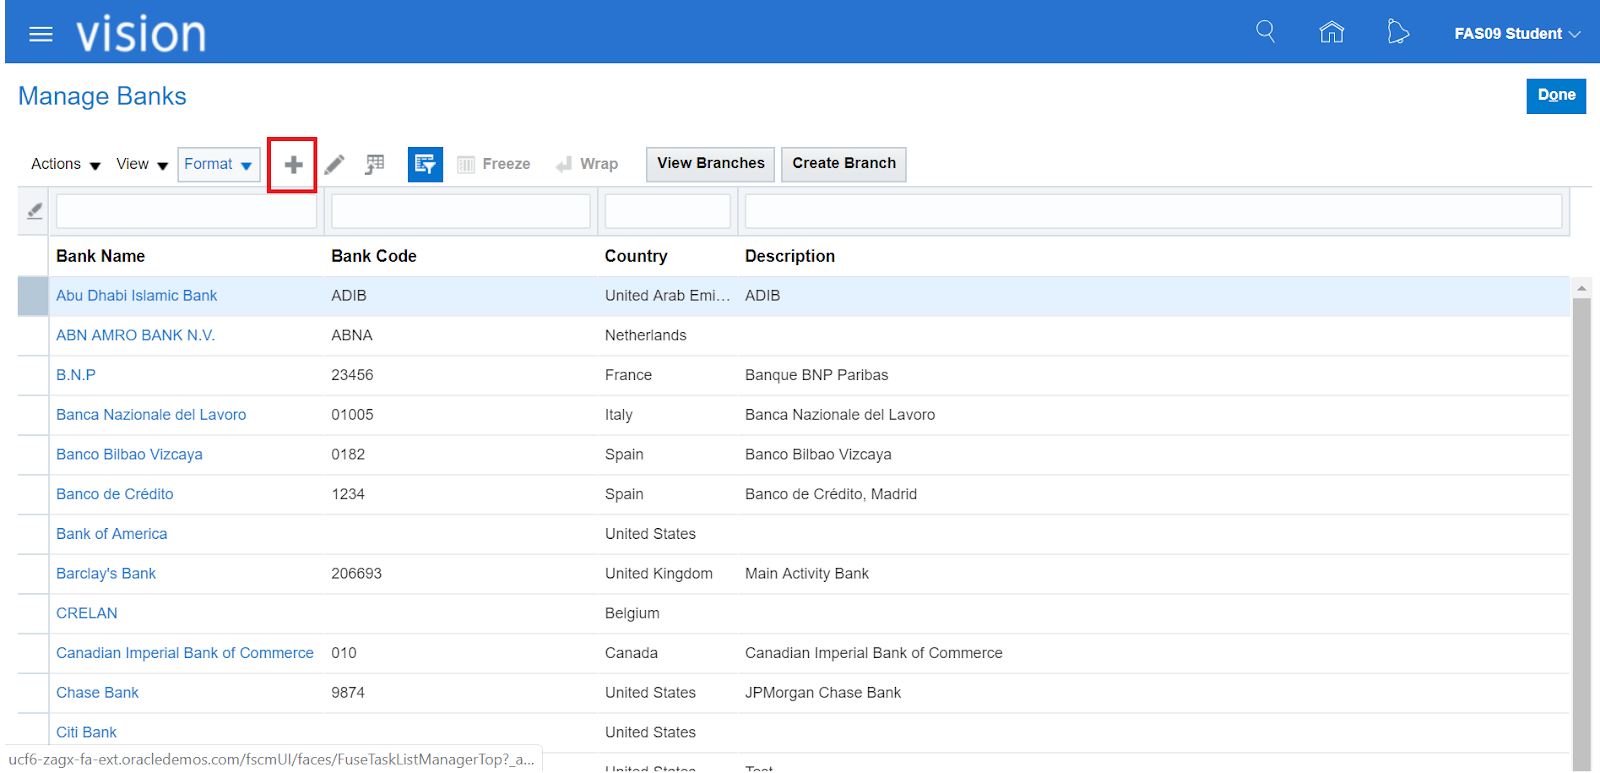
In the Manage Banks screen, click on the + Icon to add a new Bank and fill up the required fields:
In the "Create Banks" screen, fill up the required fields of the Bank such as the Country and Name. Other fields such as contacts and addresses are optional. Once done, click on the "Save and Close" button:
Back in the "Manage Banks" screen, select the newly created Bank and click on the "Create Branch" button to add a new Bank Branch:
In the "Create Bank Branch" screen, fill up the required field ("Branch Name"). Again, the other fields such as contacts and addresses are optional. Once done, proceed to Save and Close.
Back in the "Manage Banks" screen, select the newly-created Bank and click on the "View Branch" button to View the newly-created Bank Branch:
In the "Manage Bank Branches" screen, select the desired Bank Branch and click on the "Create Account" button:
In the "Create Bank Account" screen, specify which legal entities will have access to use this
Bank Account and tick the corresponding check boxes if the Bank Account will be used for Payables, Receivables and Payroll functions. Also, take note of the tabs on this screen. These tabs will be very important for Cash Management.
Under the General Tab, the GL Accounts section shows accounting
information such as Accounts to be used for Cash, Cash Clearing and Reconciliation
Differences. Under the Payment Documents section, this specifies what payment
documents will be used by this bank account. These are going to be important
for payables.
Under the Controls tab, there is a section dedicated to Reconciliation
such as the Tolerance Rules, Auto Reconciliation Rule Set, Start Dates, etc. Also,
under Bank Statement Processing, this is where Parsing Rule Sets and bank
statement transaction creation rules are configured for the Bank Account. Further
below, there are also some options for Payables for minimum and maximum
payments, and then some forecasting options for Cash Management.
Under the security tab, That's an option where you could
secure the bank account by directly assigning roles and/or users directly to
the bank account.
Lastly, under the Business Unit Access Tab, you can specify
which business units has access to the bank account.
If the the "Business Unit Access" tab is not filled up, you will get the below error message:
Add the necessary Business Unit access and the correct Payment Document to be used by the Bank and Save:
Below is a quick Video demonstration of creating Banks, Bank Branches and Bank Accounts in Oracle Fusion Applications: