Oracle Fusion Applications can provide three options for a home page layout: Newsfeed, Panel, and Banner. These are all set by the System Administrator.
News Feed Layout
Has the Analytics page section readily available. Panel Layout
Banner Layout:
Has the Page Control dots to show the user's Infolets.
Changing the Home Page Layout
For you to change the Layouts or Appearance, the System Administrator would need to go into a "Sandbox" environment. Any changes applied to this Sandbox will only be visible to the user logged in and would need to be "Published" before all users in the system can see the changes. Do note that the Sandbox would only be available to the "System Administrator" Role. Below are the steps on how to change the Home Page Layout:
Log in to a User that has a "System Administrator" Role.
Go into a Sandbox by clicking on the Logged in User's name and click on "Manage Sandbox"
You can either create a new Sandbox or activate an existing Sandbox.
Click on the Navigator and select the "Appearance" menu
Select the desired Layout and click "Apply". Wait for it to take effect.
Click on the Home icon to navigate to the Welcome Springboard and see the applied home page layout.
You may now publish the Sandbox and the desired layout will now be applied to the production environment.
Below is a video demonstration for further clarity:
Don't forget to leave a comment and subscribe to future tutorials! :)
Below is a quick diagram of the Oracle Financials Cloud Modules and how they all interact with each other. Note that most of these modules are also found in Oracle E-Business Suite.
Below summarizes some of the important modules in Oracle Financials:
General Ledger (usually abbreviated to GL)
The Financial application that records all the finalized transactions of an organization
Deals with Ledgers, Periods, Currencies, Accounting Convention (sometimes called SubLedger Accounting Method) and finalized financial reporting
SubLedger Accounting (usually called SLA)
A subset application of the General Ledger that holds all the finalized transactions of the other modules (somewhat like an interface).
Transferring data from Subledgers to the General Ledger can be done on the Balances, Journal and Subledger Level (Lowest to Highest, respectively)
Payables (sometimes called Accounts Payables or AP)
The Financial application that deals with Suppliers and Payments
Also linked to the Procurement Module via Purchase Orders and Requisitions
Invoices can be automatically created once a Supplier has delivered the ordered goods and the organization has confirmed it.
The Payment process can then be initiated and electronically transmitted to the Bank for Processing.
Run Create Accounting to Transfer to SubLedger Accounting (SLA)
Expenses
A subset application of Payables that deals with employee expense reimbursement such as Travel, Food, Accomodation, etc.
Expenses Can be entered via Spreadsheets, Mobile Application and usually goes through an approval process
Once approved, the expense will become a Payment Request in Payables for Reimbursement to be paid to the Employee
Follows the same process of "Create Accounting" through Payables
Assets (sometimes called Fixed Assets in EBS)
The Financial application that deals with Company Assets and how their value fluctuates over time.
Can be linked to Payables when an organization orders goods that are tagged as an Asset.
Assets can then be posted into the "Asset Book" and starts the Asset life cycle (Appreciation, Depreciation, Transfer, Adjustments, Retire, etc.).
Run Create Accounting to Transfer to SubLedger Accounting (SLA)
Receivables (sometimes called Accounts Receivables or AR)
The Financial application that creates and sends Invoices to Customers (can be created Manually or interfaced via AutoInvoice from Projects, third-party applications, etc.)
Receipts are then issued once customers have paid the Invoices
Run Create Accounting to Transfer to SubLedger Accounting (SLA)
Advanced Collections
A subset application of receivables that deals with customer payment collection.
Collectors can review delinquent, non-paying Customers and issue a reminder in the form of Dunning.
Customers can then issue a Promise to Pay letter or raise a Dispute on payments.
Every action a collector and customer is recorded in the application and can automatically raise flags/reminders when thresholds are not met.
Cash Management (usually abbreviated to CM)
Reconcile Bank Statements to and from the Bank and link up to transactions within the application such as receipts
Includes Miscellaneous Transactions such as Bank Interest and charges
Cash Forecast and Positions
Transactions such as External Transactions (Bank Charges or Interest Income) and Bank Account Transfers initiated from the Cash Management application goes into SubLedger Accounting
Tax (called E-Business Tax in EBS)
Module responsible for the Calculation for Tax for both AR and AP
Can be automatically linked to third-party tax providers such as Vertex
Defines the Tax Regimes, Rates and Tax Recovery Rates, depending on the geographical area
Chart of Accounts (CoA) - helps organize accounting the data into segments
Calendar - the Calendar identifies the time frame of the transaction
Currency - provides a financial measurement
Convention (or called Accounting Convention) - the statutory requirements of how we conduct our accounting (i.e. IFRS, US GAAP, etc.)
Chart of Accounts:
- Minimum of 2 Segments, Maximum of 30 Segments
Three types of Ledgers:
Primary Ledger
Secondary Ledger
Reporting Currency Ledger
You may have multiple Primary Ledgers for each each Legal Entity, depending on the country you're implementing for. A Secondary Ledger also shares all the data as the Primary Ledger, but may have a different accounting convention (i.e. US GAAP and IFRS).
A Reporting Currency Ledger shares all the data as the Ledger its attached to, but may have a different Currency (i.e. US to JPY). Note that one can have a separate Reporting Currency Ledger attached to a Primary and Secondary Ledger.
To Create a Supplier, the User must first be granted the seeded role of "Supplier Manager". Navigate to the Security Console from the Navigator:
Click on the "User" tab and search for your desired user to grant the role to:
Click on "Edit" and proceed to click on the "Add Role" button:
Select "Supplier Manager" from the List of Values (LoV). If there is another role with a similar name, choose the Role with the Code of "ORA_" as the prefix. This signifies that it's the seeded Oracle role.
Once done, click on the "Add Role Membership" button and Save. You may need to logout and log back in after a few minutes for it to take effect to the desired user.
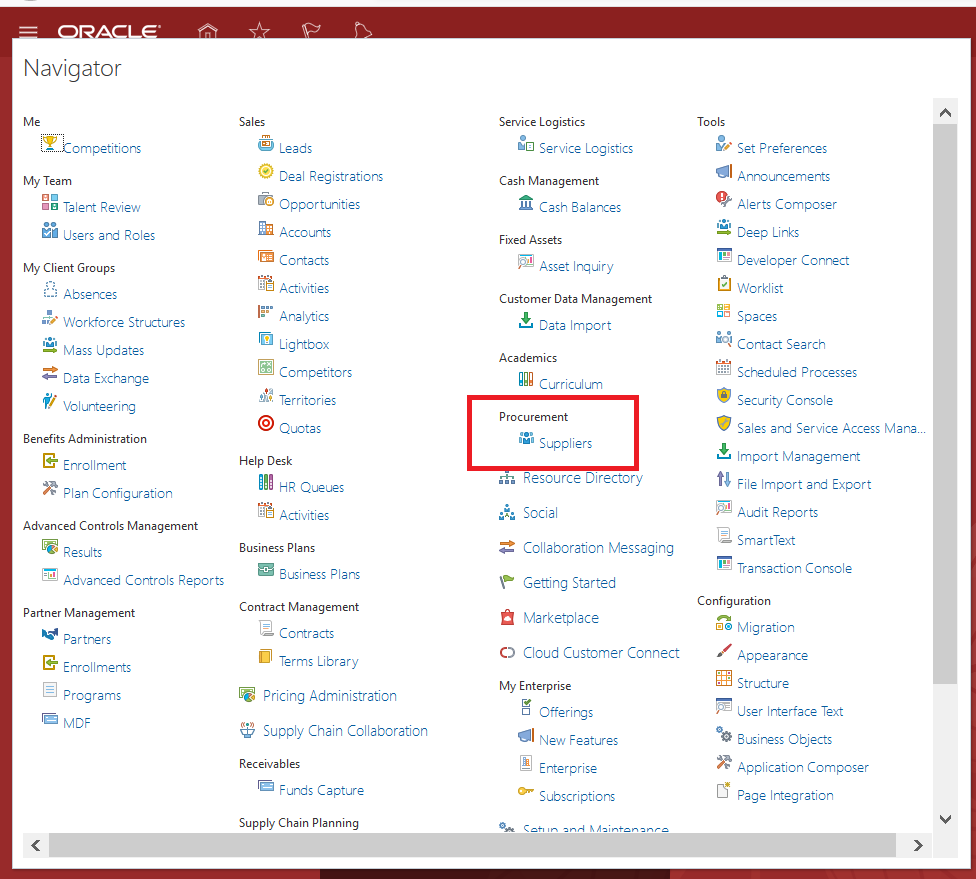
Click on the Navigator and select "Suppliers". Alternatively, you may click on the "Procurement" Menu on the Welcome Springboard and proceed to click on "Suppliers".
Click on the Task Pane and select "Create Supplier". Fill up the initial required details and click on "Create":
Once done, The initial details of the Supplier will be created. Please take note that you would still need to complete other important details before you can proceed to use the newly-created Supplier. You can view the details still pending for the Supplier by viewing the "Suppliers with Incomplete Setup" section in the Supplier screen:
A quick step-by-step Video demonstration can be found here:
Go to Setup and Maintenance > Choose the "Financials" offering and select "Manage Procurement Agents" under the Tasks.
Select the desired Business Unit the Agent will come under:
On the Manage Procurement Agents page, you may either search for an existing agent by filling up the required fields and clicking on the "Search" button, or you may click on the "+" sign to add a new agent:
In the "Create Procurement Agent" page fill up the Required fields and identify if that specific agent needs access to other Agents' Documents as well.
Click on "Save and Close" and you may verify if the Agent has been created from the "Manage Procurement Agent" page:
Accounting periods (or called GL Periods in Oracle Applications) is one of the most important aspects in a General Ledger. It defines how the transactions will be grouped together based on dates (usually their actual transaction dates) and also defines the accounting calendar. This concept applies to both Oracle Fusion and Oracle E-Business Suite. Below is a simple diagram depicting GL Period Cycles:
A quick sample is below:
Period
Month
Period Status
Remarks
May 2018
Permanent Close
Can never be re-opened and Posting not allowed
June
2018
Soft Close
Can still be re-opened in case of
Omission/Incorrect Data.
Need to have Financial Statements
re-stated.
July
2018
Open Period
Allows transactions, Receiving and
Posting
August
2018
Future Enterable Period
Allows transactions and Receiving but
no Posting
September
2018
Never Opened
No transactions and receiving allowed
Below is a quick checklist to follow when closing periods from a GL Perspective:
Import data into the Interface from other sources (Subledgers, Third-Party Applications, etc.)
Transfer transactions from the Interface into the General Ledger
Verify that all Journals are already Posted
Perform Allocations
Perform Revaluation for Trade Accounts containing foreign currency transactions
Reconcile Account Balances
Translation of Balances to the Parent Currency
Consolidation of Subledgers to the Corporate Ledgers
Run Analytics and Financial Analysis
Close the Period and Open the Next Period
Some companies never do a permanent close in case they need to do some corrections.
What they sometimes do is they only close out the all the periods of a certain calendar year when the external auditors are satisfied and provide a clean audit report for the said year.
It all depends on your accounting policies and strategies that fit your legislation and accounting methods.
Below is a quick demo on Opening and Closing Periods in Oracle Fusion Applications:
More details on Opening and Closing Accounting Periods posted on the Oracle Documentation.
You can create Journal Entries in Oracle Fusion applications in two ways.
You can create it manually one-by-one or by Bulk through Excel Spreadsheets using the File-Based Data Import for Financials Cloud (commonly known as FBDI). For the manual process, you may refer to the tutorial found here: Create GL Journal Entry in Oracle Fusion Applications. For the bulk process, you first need to install FBDI on your Local PC and ensure you have the appropriate Microsoft Office version installed. For this article, we will use Microsoft Office o365 or 2016 and FBDI version 11.1.1.9.3 (build 5.0.2.18097).
Go to General Accounting > Journals
Click on the Task Pane and choose Create Journal in Spreadsheet
Depending on the browser, you will be asked to either open the file in Microsoft Excel (for Mozilla) or it will download the file on your Local PC right away (for Chrome). Either way, proceed to open the file in Microsoft Excel:
Once the file has been opened in Excel, click on "Enable Editing" and proceed to confirm that you want to Connect:
You will be prompted to login using your Username and Password. Use the Username and Password that has the appropriate access to the Ledger you want to import transactions in.
Once login has been confirmed, the spreadsheet will now show the appropriate fields and you can proceed to input the Ledger Header and Line Details. The fields below in Red are the recommended fields you must populate:
For the Chart of Accounts (CoA), You may manually input the values or double-click on the field to select from the List of Values (LoV):
If you've completed entering the necessary information, proceed to click on "Submit" from the Ribbon. You will be prompted to select an option to either:
Save the data to the GL_INTERFACE table without importing into the GL Base Tables (GL_JE_HEADERS, GL_JE_LINES, etc.)
Save the data to the GL_INTERFACE table and subsequently import data into the GL Base Tables
Save the data to the GL_INTERFACE table and subsequently import data into the GL Base Tables and process them for Posting
Once the process has completed successfully, the status will show as "Row inserted successfully" in the "Row Status" column in the Spreadsheet.
On the other hand, Error Lines will show as "Error" and you may update any incorrect data and resubmit to try again.
To verify the uploaded data, navigate to the Springboard > General Accounting > Journals then click on the Task Pane and select "Manage Journals".
You may use the Ledger name you've provided to quickly search for your Journal Batch:
Below is a quick video demonstration on the topic above:
To Create a custom Journal Source and Category in Oracle Fusion Applications,
Navigate to Setup & Maintenance and select the "Financials" Opt-in and to General Ledger.
From here we can choose the Task "Manage Journal Categories" and "Manage Journal Sources" to create a custom Category and Source, respectively.
In "Manage Journal Sources", Click on the "+" button to add a new Source and you may specify if this Journal source requires Approval or not. You may also hover to the under dashed words to find out more information on the other options.
The same goes for "Manage Journal Categories", Click on the "+" button to add a new category. Do note that you cannot delete the Source and Category anymore once it was been created.
After you've saved the newly-created Source and Category, you may now use these during Journal Batch creation. The Custom source can be used when importing Journals from third-party applications and the custom Category can be used even on Manual Journal creation.
To create a General Ledger Journal Entry in Oracle Fusion Applications, navigate to your springboard and go to General Accounting > Journals:
on the Journals dashboard, you can see items that are important to your process such as Journals that require your attention (Error or Incomplete) or journals pending for approval from your superiors, etc. These are being populated by Oracle Fusion's embedded intelligence. To proceed with creating a Journal, click on the Task Panel and select "Create a Journal":
In the "Create Journal" screen, you have three sections: Journal Batch, Journal Headers and Journal Lines. A Journal Batch name and a Journal name is not required but is recommended to make searching and viewing easier later on.
Journal Lines is where you'll put your accounting code combinations (sometimes called as Chart of Accounts or COA) and the Credit/Debit amounts.
Also make sure to select the correct Journal Category to correctly classify the Journal Entry:
Once done, you may save and mark this entry as Complete and Post it.
Depending on your organizational settings, this may require some approval from your direct superiors. This may be configured to skip approval.
You may revisit your entry by navigating to the Journals Dashboard > Task Panel > "Manage Journals" and search for your transaction using your Journal Batch name or period:
Below is a video demonstrating further:
Hope this helps! Don't forget to like, share and leave a comment. :)